Saturday, May 21, 2011

A little something to brighten your day...

RAINBOW CUPCAKES!

I was asked to make cupcakes for Zekie's friend, G's 3rd birthday party. The party had no theme so I got to make the call as to what to bake. I'd been wanting to try out the "colorburst cupcake" that I've seen on the 'net for years and this was my chance. G's favorite color happens to be pink so I ditched the traditional rainbow colors for something that would flow with pink. I went with a vanilla cupcake, although I'm sure you could do yellow or coconut or lemon or anything light colored.

Here's the batter, seperated in bowls, ready for color gel. DO NOT USE LIQUID FOOD COLORING (that stuff is nasty).
Photobucket

All colored up and ready for layering
Photobucket

Okay so I forgot to take a picture of the actual layering process but you just take a spoonful and spread it with your finger (dipped in water). Repeat with all 5 colors. When baked they should come out looking something like this...
Photobucket
Okay, so mine don't look that great. I got tired at the end and didn't spread all the way over like I should have.

Once you top it with frosting, no one can tell ;)
Photobucket

And here's the birthday boy enjoying his cupcake. Happy 3rd Birthday G!
Photobucket

Thursday, May 19, 2011

Cinco de Mayo!

I told you I'm back tracking, right? We went to a gathering at a friends house for Cinco de Mayo, which is a big deal for Americans and not so much for Mexicans lol. Although my first idea was to make margaritas, I decided on a cuatro leches cake with cajeta. Before you ask "what the heck is that?" I'll explain it. Cuatro leches basically translates to 4 milks and cajeta is a cinnamon caramel sauce. Let's explain this in pictures, shall we?

Primero, la cajeta...you'll need
2 quarts goats' milk (or whole milk if you must)
2 cups granulated sugar
2-inch cinnamon stick
1/2 teaspoon baking soda, dissolved in 1 tablespoon water

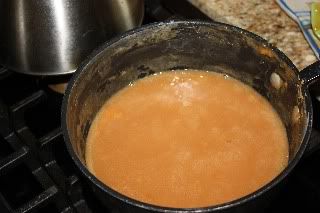
In a large saucepan, bring the milk, sugar, and cinnamon stick to a simmer, stirring frequently.
Remove from the heat, add the baking soda, and stir to combine. When the bubbles disappear, return the pan to medium heat. Bring to a brisk simmer, stirring frequently, until the mixture begins to turn golden brown, about one hour. Continue to simmer until the mixture thickens to the consistency and color of maple syrup, about 20 minutes. Remove from the heat, strain through a fine mesh sieve, and set aside keeping warm.

This is what it looked like after 20 minutes
Photobucket

After 70 minutes...
Photobucket

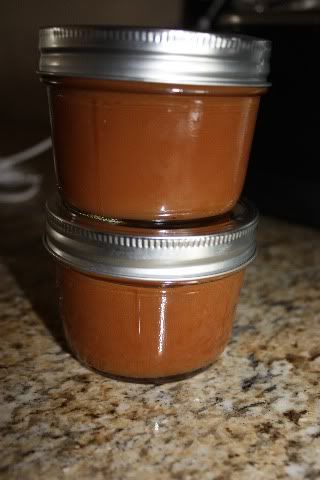
And finished product (would make a great gift).
Photobucket

Now for the cake...
1 1/2 cups all-purpose flour
1 teaspoon baking powder
1/2 cup unsalted butter
1 cup white sugar
5 eggs
1/2 teaspoon vanilla extract
1 tsp cinnamon

1 cup whole milk
1 (14 ounce) can sweetened condensed milk
1 (12 fluid ounce) can evaporated milk
1 cup coconut milk

1.Preheat oven to 350 degrees F (175 degrees C). Grease and flour one 9x13 inch baking pan.
2.Sift flour cinnamon and baking powder together and set aside.
3.Cream butter or margarine and the 1 cup sugar together until fluffy. Add eggs and the 1/2 teaspoon vanilla extract; beat well.
4.Add the flour mixture to the butter mixture 2 tablespoons at a time; mix until well blended. Pour batter into prepared pan.
5.Bake at 350 degrees F (175 degrees C) for 30 minutes. Pierce cake several times with a fork.
6.Combine the whole milk, condensed milk, coconut and evaporated milk together. Pour over the top of the cooled cake and let the milk soak in. Put in refrigerator until cold.

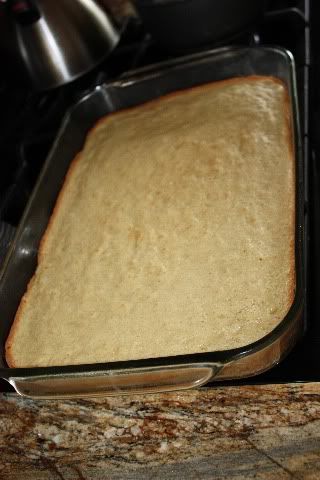
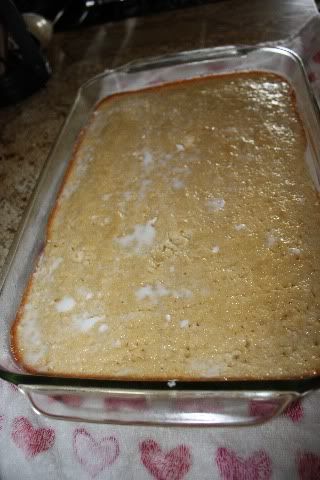
This is the sponge cake all baked up and ready for its milk bath.
Photobucket

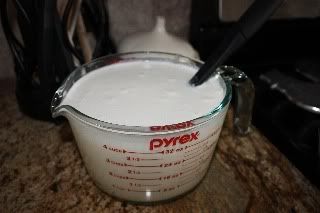
This is all the different milks mixed up.
Photobucket

After poking the cake and dumping the milk all over it, wait a few minutes and it will look like this...
Photobucket

Mix up some whipped cream "frosting" and slather it on
Photobucket
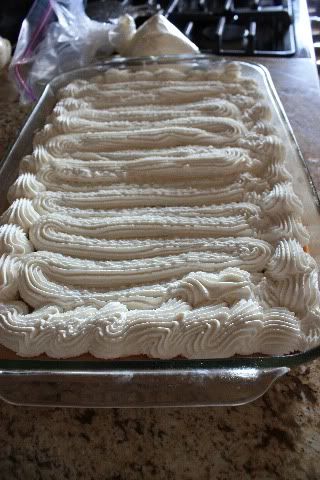
Don't forget to drizzle some cajeta on top!

Even though the idea of a milk soaked cake may not appeal to you, I encourage you to try it. It really is very light and tasty, it's also pretty refreshing to eat a chilled cake.

Yums to everyone!


Photobucket

Friday, May 6, 2011

Easter!

So it's a few weeks after Easter and I'm just now posting my Easter cupcake. Ah well, it's really cute it'll make up for my procrastination. This is not an original idea, I saw it somewhere and had to copy it. It was a great project for Z and I to do together.

Here are most of the ingredients for the coconut cupcake.
Photobucket

All baked up and ready for some decorating action!

Photobucket
Photobucket
"Grass" is smeared on, (buttercream frosting made with coconut milk).

Look how cute!!
Photobucket

Yes, I forgot to take a picture with my camera... an iPhone picture is going to have to do this time. I used colored twizzlers for the basket handle, jelly beans for the eggs and a bunny peep for the, well, bunny.

Coconut Cupcake (pretty sure I used this recipe...http://simplyrecipes.com/recipes/coconut_cupcakes_with_coconut_cream_cheese_frosting/)

3/4 cup of unsalted butter, room temperature
1 1/4 cup of sugar
3 eggs, room temperature
1 cup of canned coconut milk
1 teaspoon of vanilla extract
2 1/4 cups of cake flour
1 teaspoon of salt
1 teaspoon of baking powder
1/2 cup of sweetend coconut

1 Preheat the oven to 350 F. Cream the butter until light and fluffy. Add sugar and cream till light and fluffy again, scraping down the sides halfway through to ensure even mixing.

2 Add the eggs, one at a time, beating for 30 seconds each to ensure mixing. Be sure to scrape down the sides after each egg to ensure even mixing.

3 Combine the flour, salt, and baking powder in one bowl. In another add 1 cup of a well shaken can of coconut milk and a teaspoon of vanilla. Add 1/3 of the dry ingredients and mix, then add 1/2 of the wet ingredients. Continue alternating with the wet and dry mixtures, ending with the dry. Stop mixing once just as the ingredients become incorporated; do not overbeat.

4 Fold in the coconut. Scoop into cupcake papers about one half to three-quarters of the way full. Bake for 18-22 minutes, rotating the pan after the first 15 to ensure even baking. Be sure to check with a toothpick to see if the cupcakes are done. If the toothpick comes out of the cupcake clean, then they're ready. Allow the cupcakes to cool for a minute or two in the pan, then transfer to a wire rack to cool completely.

Photobucket
They were a hit!